Lifestyle & Culture, Link in Bio
DIY Automated Monotub
Feb
Step by Step
Products Used
- 66 Qt tub → Buy on Amazon
- Hole saw set → Buy on Amazon
- Drill → Buy on Amazon
- Computer Fan → Buy on Amazon
- Cap plugs → Buy on Amazon
- Spray Paint → Buy on Amazon
- Polycrylic finish → Buy on Amazon
- Terrarium humidifier → Buy on Amazon
- Micropore tape → Buy on Amazon
- Daylight LED → Buy on Amazon
- Digital cycle Timer → Buy on Amazon
Video Transcript
Hey and welcome to the Relief Treats channel. Today I want to show you how to piece together your very own monotub. I’ll also show you some of the many things you can do to make it as productive, automated and contaminant free as possible while still generating some great yields. If you like what you see, hear and learn today be sure to hit that like and subscribe button. Also, check the video description for links to the products used in this video and let’s get to it.
First, I have this 66 Qt Sterilite tub with a clear lid. Very important that everything is clear including the lid and this one here has locking handles which cost a little more but also provide a little extra peace of mind. This was about $14 after tax but if you find one on sale even better.
First thing we’re going to do is focus on ventilation. We want to be able to create a carbon dioxide rich environment when colonizing the tub but then we want less co2 and more oxygen when it’s time to start fruiting. So we want a tub that can help create both types of environments.
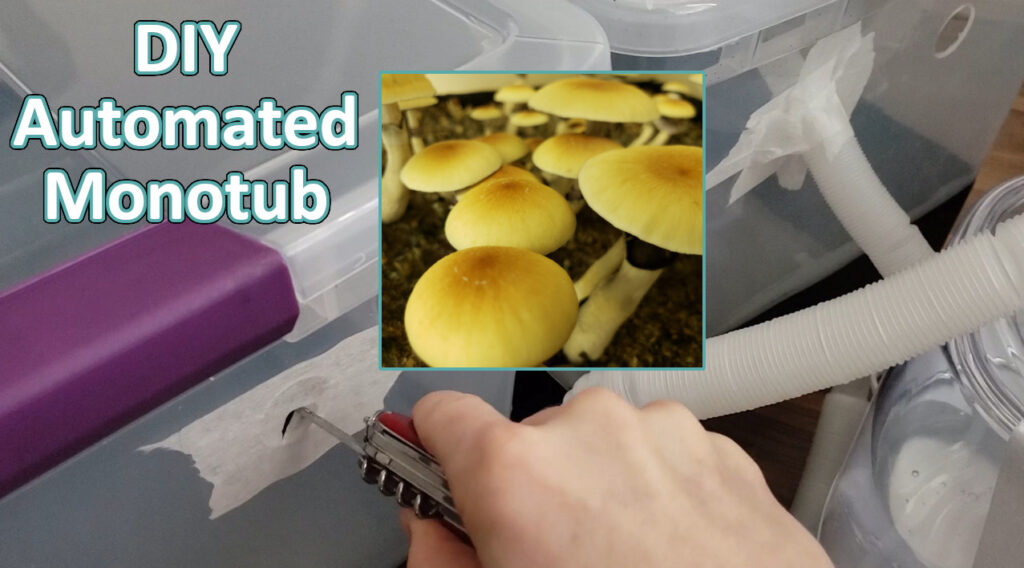
In order to do that we’re going to first cut some holes out; 4 holes about 4.5 inches from the bottom on each long side and 2 holes about 2 inches from the top on each short side. We’re going to use a 1 inch hole saw for this, you can get an entire hole saw kit with many varying sizes for about $25 or just buy the individual sizes you need for about $5 each. We’re using a 1 inch hole saw because we found these really useful cap plugs that fit a 1 inch hole which will be needed in certain phases of growth. These were in a pack of 30 for about $15.
A tip I’ll share with you on drilling your holes would be to start by drilling your pilot hole and once you have your pilot hole stop drilling, put your drill in reverse (as if you’re unscrewing a screw) and finish the actual hole by drilling in reverse. Do this because the teeth on the hole saw face one direction and kinda bite as they cut. If they cut in the normal direction then the bites they take are very hard and rough on the plastic which can often lead to cracking the tub resulting in wasted time and money. By switching to reverse the teeth won’t bite into the plastic as hard which reduces your chances of cracking. In either direction, easy does it. This is only plastic and it will crack if you’re not careful.
You’ll want different amounts of ventilation throughout the different phases of your growth. Along with our 1 inch holes we’re also going to drill a larger hole to accommodate this computer fan which was about $15. Key thing here is that it’s a fan that plugs directly into an outlet and you’ll just want to use a hole saw big enough to accommodate it.
This one mounts with 4 screws and it came with these really cool matching screws which unfortunately we can’t use because they will rust way to easily in our humid growing environment. Take these to your nearest hardware store and match them up with stainless steel in the same size and make sure you get stainless steel nuts for them too. You want to put this pretty high up on the tub so that it doesn’t blow directly onto mushrooms. Getting a marker into these tight spots can be difficult but remember the monotub is clear, the other side works just fine. This one came with a little grill to help keep larger things out. And make sure you mount the fan with the fresh air blowing IN to the tub.
We won’t need this fan in the beginning. A really cheap pack of plastic plates at the dollar store can be used to cut out some pieces with scissors that will block this hole to create a co2 rich environment during colonization time. Then when it’s time to fruit they’ll slide right out. The fan will plug into a cycle timer which cost $16 but we have 2 of them for this setup so $32 total for timers.
Next we’re going to paint the bottom 3 ¼ in of the outside black. We do this to block light from the bottom to prevent side pinning, or growth within the substrate that doesn’t actually grow up and out to a harvestable state. Because we don’t want unharvestable things growing in there taking up our valuable nutrition.
Flat black spray paint would be best and if you really want to be thorough you can add a primer and a finish, this is flat polycrylic finish. It will add protection to the coat of paint and help keep it from cracking or chipping as the monotub ages and gets shifted around. You can also wrap the bottom in tin foil or black garbage bag, or as a last resort, create a liner for the inside of the tub with a black garbage bag. Adding something to the outside is better because the more you add to the inside of the tub the more you have to sterilize and the more you risk contamination so if possible try to stay on the outside when prepping this bottom portion.
Now onto humidity. A cool way we can automate this is by getting a humidifier. They start at about $30 but this one cost $60, it has a splitter piece and can be used on 2 separate monotubs simultaneously. The hose fits nicely into these 1 inch holes and we can secure it as well as the gaps with micropore tape when the time comes. Paul Stammet, world renowned mycologist and mushroom expert, recommends rain water as the best kind of water for mushrooms. It’s best to always boil your water and wait for it to cool before using it in the monotub. And this humidifier is where the 2nd cycle timer will be used.
Another thing you should consider for your monotub is lighting. This monotub will be in a room with windows and will get plenty of ambient, indirect sunlight in a natural circadian rhythm. But if you’ll be growing in a darker area like a closet or under a bed then you’ll want to add some light to your setup as well. LED strips are fine to minimize energy usage and heat but fluorescent bulbs are also acceptable. You want bulbs that emit light in the blue light range on the Kelvin scale. These bulbs are usually labeled as daylight bulbs and are usually in the 6,000-7,000 Kelvin range or higher. Again, none of this is needed if you have even just a little indirect sunlight from a nearby window. But if you’ll be adding light to your setup I encourage you to experiment with your light cycling. Many would agree 12hrs on 12 hrs off is more than enough while some would argue even that is way too much light. You could probably get away with far less but that depends on variables like existing lighting, mushroom strain, type of light bulb and more. You’ll know if your mushrooms are getting enough light by the amount of color they develop. If they show less color it means they need more light and if they have plenty of color then they’re getting plenty of light. Obviously, make sure you know what your mushrooms are supposed to look like before you assess. Your lights would go on a 3rd timer if you decide to use any.
Regarding timers, digital timers usually perform better than mechanical timers because if you look at this mechanical timer it seems like each increment is about 15 minutes, you can see it’s only about 4 increments per hr here and I just don’t have a need for 15 consecutive minutes of fan or humidifier. So the digital ones give you far more control to dial things in and the cool thing about these is they have a cycle feature. So they power on for a minute or so, and then off for some time and then back on again and off again endlessly. You would do this for humidifier, fan and light and how much time for each is going to vary on a lot but something to keep in mind is to set the humidifier to come on after the fan completes so that the fan doesn’t immediately dry out any moisture that the humidifier just added. Mushrooms like very humid environments so make sure your fan and humidifier don’t conflict with or negate each other. And you can tinker with these times based on your results to find your optimal schedule.
So that’s everything you see here on this monotub and you can go even deeper with the automation but this should be plenty especially for beginners. Now I’ll explain a little about how this tub can function throughout the different growth phases of your mushrooms. But real quick before we do that If you’ve made it this far in the video chances are it’s been helpful. Be sure to hit that like and subscribe button. Also, as a reminder check the description for links to some of the products I used as purchases through those links help this channel grow and now let’s get back to how this monotub functions.
First thing we talked about was ventilation. This tub has ventilation holes that will be covered in the beginning phases when all we want is mycelium colonization. Again, that’s what these cap plugs and plastic plate cutouts are for. They will limit free air flow and oxygen, helping to create a carbon dioxide rich environment. When we’re ready to start fruiting the cap plugs get replaced with micropore tape and the plastic cutouts get completely removed. The fan may not even be needed for the first flush, but the plastic plate guards still come out anyway. Be sure to keep an eye on things. Two obvious signs that you may need more air flow would be no or slow mushroom growth and fuzzy feet on mushrooms, or mycelium growing at the base of mushrooms that looks like fuzz.
Next thing we talked about was humidity. We have a humidifier for that but again it may not even be needed on the first flush. Typically, the tub is humid enough and the substrate is moist enough on the first flush to not have to add any additional moisture. A sign that you may have too much moisture in the tub would be pools of water anywhere, especially on the surface or sides of the substrate. And a sign that you may not have enough moisture would be dried out sides on the monotub with no condensation or substrate that feels dry to the touch. Only add humidity after the fan is complete.
And then we also talked about lighting which is really only needed if the tub isn’t getting enough light throughout the day. A circadian rhythm is best but exact time is going to depend on your other variables. An LED light strip would easily mount to the lid f needed.
And lastly, is it possible to grow mushrooms less expensively and without such a fancy setup? Of course, it will just be less automated and require more manual work. You can also go further with automation of the tub and spend even more. The choices are yours when deciding what you do and don’t want to have in your growing process. Thanks for watching